
Building VMware Test Lab on MacBook Pro
- Marcus Yeo
- Jan 8, 2020
- 5 min read

As mentioned in my earlier post, I created a test lab environment in preparation for my VCP exam. This is a simple explanation of how I built my home lab using just my MacBook Pro. It is intended to be a mid-level description, as it will be too long if I go into every single detail.
Spec of my MacBook Pro:
MacBook Pro 2018 version
1 TB SSD (For the lab environment, SDD is highly recommended. Minimum requirement is to have 200GB)
32 GB RAM (This is the minimum requirement for the lab. Preferably, it will be good to have 64GB of RAM)
2.2 GHz 6 core i7 processor (Processor is not expected to have any contention)
Software Licenses which you will need:
1. MS Windows Server and SQL Management Studio trial
Microsoft Windows Server 2012 R2 or 2016 180 day trial DVD, ISO file
Download Windows Server via Microsoft TechNet evaluation center (https://www.microsoft.com/en-us/evalcenter/try)
Download SQL Mgt Studio via http://go.microsoft.com/fwlink/?LinkID=228417&clcid=0x409
2. Licensed VMWare Fusion
3. VMware software license key
vCenter and ESXi
VMware PowerCLI installer
VMware Tools windows.iso
Recommended: Sign up for EvalExperience Advantage (https://www.vmug.com/membership/vmug-advantage-membership). Cost: USD200
You can download the trial keys @ https://my.vmware.com (But it does not have the windows version of vCenter
In my case, I am vExpert certified and have access to trial license keys
4. AutoLab script and guide (We will be using the Autolab unattended installation script for our setup)
Download from http://www.labguides.com/
Download the latest release (At time of writing, latest version was v3.0)
Download the deployment guide for your reference
Components in the Test Lab
vCenter
ESXi hosts
Domain Controller on Windows Server
Virtual NAS
Virtual Router
The Setup steps
Task 0 - Networking
Your test lab will be sitting on a 192.168.199.0/24 network
Open VMware Fusion menu > Preferences > Network tab
Click the plus sign at the bottom left to create vmnet3
In the Subnet IP field, replace Auto-Generated with 192.168.199.0
Click Apply then uncheck 'Provide addresses on this network via DHCP' and click Apply again


Task 1 - Prepare the prebuild VMs
Extract the vSphere AutoLab archive to a folder and open all VMs with Fusion
In our lab environment, you will only be needing folders of ‘DC’, ‘NAS’, ‘Router’, ‘VC’, ‘Host1 to 4’


When you power on each VM you may be asked whether you moved or copied the VM. Always answer “I copied it” for these VMs


Router
Power on the Router VM, and wait for it to boot to the logon prompt.
This is all you need to do for the Router setup.


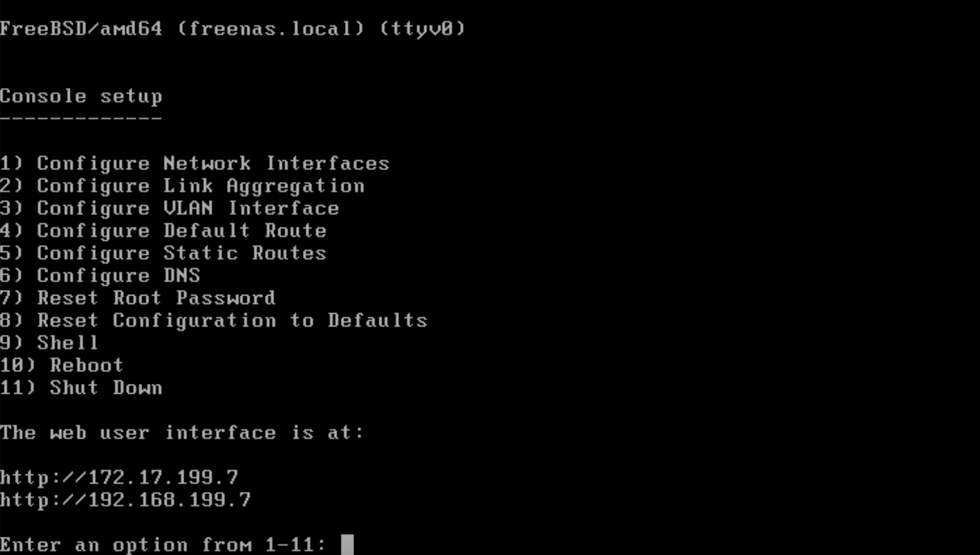
NAS
Power on the NAS VM and wait for it to boot to the logon prompt. The NAS will be allocated with an ip of 192.168.199.7.
After boot up, press ‘Command + K’ to open the ‘Connect to Server dialog box and enter ’smb://192.168.199.7/build' and connect as Guest.

Populate the Build Share location with installers
Copy the downloaded ISO files into the 192.168.,199.7/build folder
Copy the Windows Server, PowerCLI and SQL Management Studio ISO and installers to the build folder itself
Copy the ESXi hypervisor installer to the ‘ESXi67’ directory
Copy the vCenter server installer to the ‘VIM67’ directory
Copy the VMWare Tools installer to the ‘VMTools’ directory


To keep things really simple in our lab, modify the ‘Automate’ proceed
Edit the ‘Auto from the ‘Automate’ folder from 192.168.,199.7/build directory (via Text Editor or Notepad)
Modify the below parameters:
- timezone: ‘TZ’
- VCInstall = ’67’ (for version 6.7 in my case)
- AutoAddHosts = ‘false’ (We do not want to auto add host)
- DeployVUM = ‘false’ (We are not deploying update manager)
- BuildDatastore = ‘false’
- BuildVM = ‘false’


Task 2 - Build Domain Controller, Windows Server
Edit the settings of the ‘DC’ VM from Fusion and make sure the CDROM drive is connected to the Windows Server ISO file which you have downloaded, and that ‘connected at power on’ is checked


Power on the DC VM to start the unattended installation. Do not interfere with the unattended installation, even when you see there is a prompt for you to ‘Install Tools’ etc
This process will take slightly over an hour. If there are issues during the installation, you can access the installation logs from C:¥building.txt to look for what went wrong.
Click on ‘Validate’ from the Windows Server desktop. You will be prompted to change the password (I suggest to continue using ‘VMware1!. Basically, if you see red from the validation windows, it means something went wrong during the installation and you should investigate the logs


Task 3 - Build ESXi servers
Power on the ESXi VMs one at a time. During the installation, when prompted, select ‘ESXi 6.7 automated builds’


Select the correct Hostx Automated Install


The unattended installation and proceed on its own and will boot up on its own.
Your ESXi host will be assigned from IP 192.168.199.11 onwards
Task 4 - Build vCenter Server
Edit the settings of the ‘VC’ VM from Fusion and make sure the CDROM drive is connected to the Windows Server ISO file which you have downloaded, and that ‘connected at power on’ is checked
Power on the 'VC' VM to start the unattended installation. Do not interfere with the unattended installation, even when you see there is a prompt for you to ‘Install Tools’ etc
This process will take slightly over an hour. After the installation is completed, you can click on the 'Autolab Script Menu' and select option 1 to validate the installation. If everyone is ok, a message 'Build looks good'.
Should there be errors shown, further investigation can be done from the build log in C;¥Buildlog.txt


At this point, you can access the vCenter via a web browser from the URL: https://vc.lab.local. ID: administrator@vsphere.local, PWD: VMware1!
Task 5 - Populate vCenter
From the vCenter, you can proceed to key in the license key, create a new data center and add ESXi host accordingly.
Adding of ESXi host could have been done automatically from the Autolab script, but I prefer to add this manually as part of the learning process
However, do take note to follow the IP address assignment from the AutoLob deployment guide which you have downloaded from 'http://www.labguides.com/' earlier.


At this point, you will want to edit the host file on your Mac so that you can directly access to vCenter from your Macbook's browser. You will need to add a new entry '192.168.199.5 vc.lab.local' to the /etc/hosts file


With this addition, you will be able to access to vC directly from your browser using https://vc.lab.local
A few more things
The AutoLab auto deployment script deploys the vCenter on a Windows VM. My personal preference is to deploy a vCenter virtual appliance instead as this is the direction for VMware moving forward. In addition, you will also have one less license expiry to worry about in your lab environment.
Do continue to keep the AutoLab zip file which you downloaded even after you have created the lab. This will be useful in the event you need to rebuild a certain portion of the lab again.
To rebuild a particular VM, you carry out the below steps:
Remove the VM from Fusion
Delete VM from LabVMs folder
Copy VM from the Zip file to the LabVMs folder
Open the VM in Fusion
"What do you think?"
Let me know if you think there are any important/useful details I have missed in the above write up.

Comments